Salt Clay Mobile
Share
Last year when we went into the mandatory stay home order, I started sharing some art lessons for mamas and daddies who needed some ideas for their kiddos, but I stopped when things opened back up.
I’ve had some mamas reach out and ask if I would be doing more art lessons because they really enjoyed getting them. I felt encouraged to learn that my lessons were useful and appreciated, but I also felt a bit guilty for not continuing them even after the stay home order was lifted and summer vacation began. I’m grateful for those who expressed their gratefulness and I look forward to providing more art lesson ideas.

When I plan a lesson, I consider a few factors:
- Will it be fun?
- Can it adapt to several age groups?
- What are the learning objectives?
- Will this art project be something they would want to keep, or will it end up in the trash? (This may not always apply.)
I'm really excited to share this lesson because the process is fun, there are a variety of concepts you can teach, and you child can display it easily in their bedroom.

Salt Clay Hanging Mobile
Make Salt dough:
1 cup table salt
1/3 cup water
½ cup cornstarch
¼ cup cold water
Directions:
Mix the salt and water into a saucepan. Heat on medium stirring continuously for about 4 minutes being sure to not let it boil. Remove from heat.

Combine ½ cup of cornstarch to ¼ cup of water. Make sure to mix the cornstarch into the water a little at a time stirring continuously or it will not mix correctly.
Put the salt mixture back on low heat and add the cornstarch mixture stirring continuously. The mixture will thicken quickly. Keep stirring until it becomes dough.

Remove from heat and let it cool until it is cool enough to handle. Place on parchment paper and knead until the dough is smooth.

Cut your shapes:
Rolling pin
Cookie cutters (geometric shapes like circle, triangle, heart, square, etc.…)
Toothpick
Parchment paper
Baking sheet
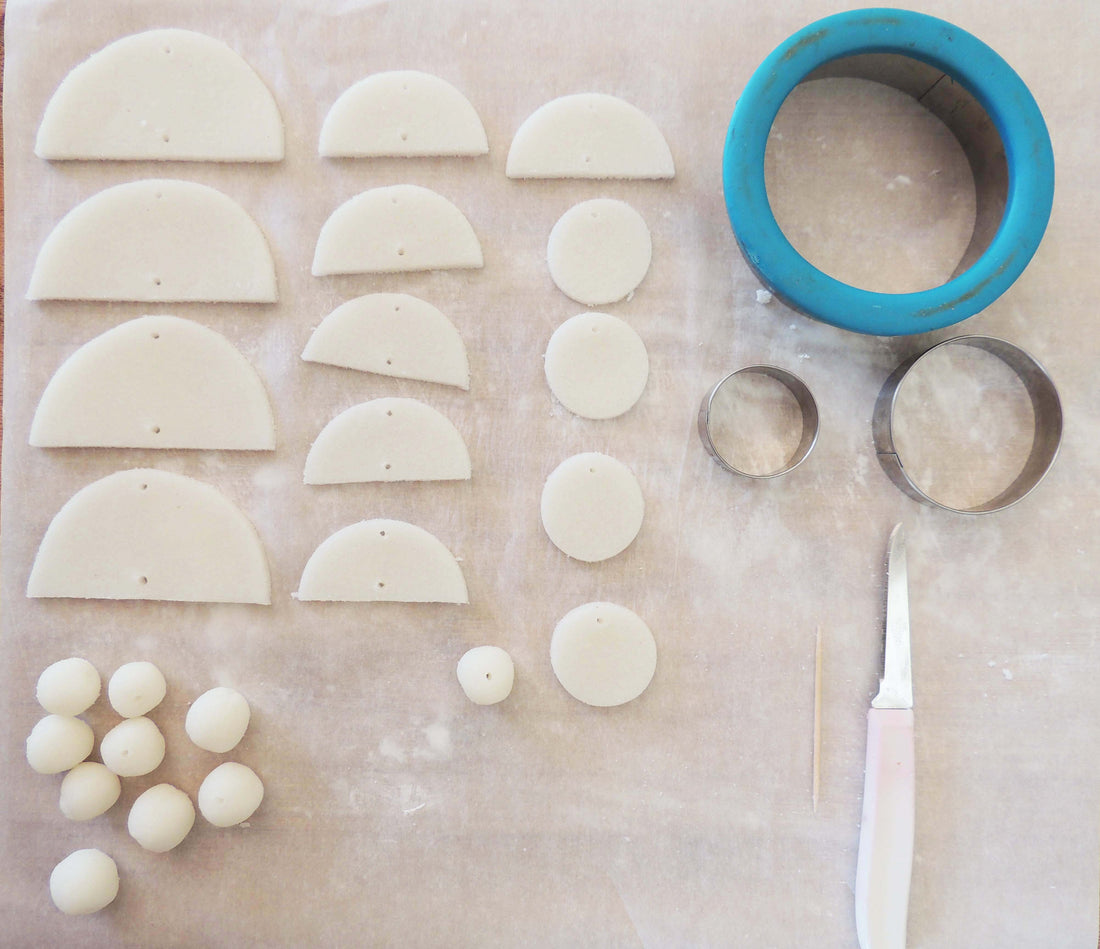
Roll dough to about ¼“ thick. Cut shapes using cookie cutters. Use this time to explain the difference between geometric and organic shapes.

Use your toothpick to create a hole in the top of the shape and the bottom of the shape. Make sure the holes line up. Tip: use the excess dough to create beads, and use your tooth pick to punch a hole all the way through the bead.


Place shapes on the cookie sheet and then into the oven set on warm (170 degrees). Leave it in the oven for about an hour to hour and half. Remove and cool.

Paint Shapes:
Paint brushes
Acrylic paint / craft paint
Styrofoam plate
Water
Paper towel
Plastic to cover your workspace

Paint each shape (front and back). This would be a good time to talk about color such as complimentary colors, primary colors, secondary colors, color mixing, warm and cool colors, etc…
Allow the shapes to dry before assembly.
Assemble the Mobile:
Dowel approx. 8” long
String
Twine
Needle


Have your child layout how they want their shapes to hang from their dowel. Use the needle to string up your shapes (start with the bottom shape and string like making a necklace. the below image shows how I strung mine). Tie to the dowel and then repeat with the other two sections.

Use one strand of twine (length depends on how you want it to look when handing) and tie each end to the ends of the dowel. Hang and enjoy!
I know you will enjoy creating this mobile together. Please share with me how it went. Was the instructions easy to follow? Did you change anything to make it unique or better? What did you struggle with (if anything)?
If you are on Instagram, I would be so grateful if you would give me a follow @bevann.art and tag me in a photo so I can see what you and your child made together.
Happy Creating,
Beverly
