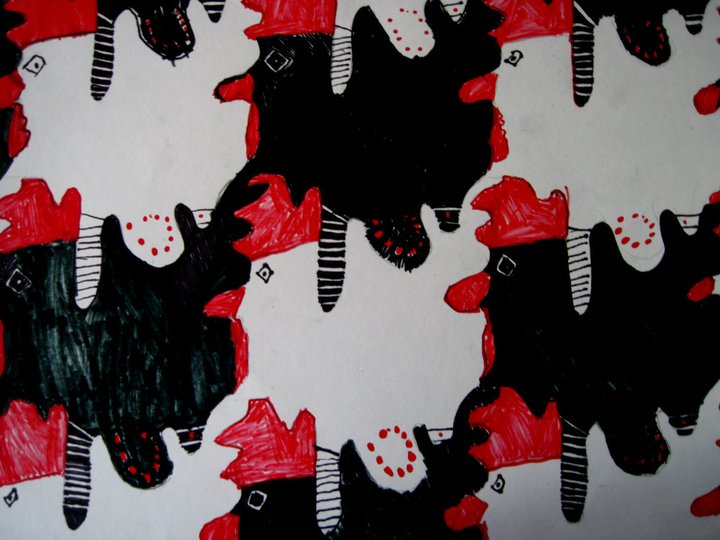
Tessellations - art lesson for kids part 1
Share
Do you like a good puzzle? When I was little my mother would have the pieces of a large puzzle stretched out on her dining room table so that when she passed by she could stop and put a few pieces together. Needless to say, she wasn't the only one that would give into the temptation to spend time scouring the pieces to find a few that could be put in place.
Tessellations in its own right is like a puzzle, where all the pieces fit tightly together leaving no gaps...think of mosaic tiles. In fact, MC Escher (1898 - 1972) is the artist that comes to mind when I think of tessellations, and he was inspired by the geometric patterns of the Moorish tiles. (Click here to read more about MC Escher)

(Rebekah Pearson 4th Grade 2010)
I decided that tessellations would be a fun lessons for my art students while also challenging them because in the least, it requires a bit of precision and imagination.
Here is a step by step:
1. Using a square ( I cut a 3"x3" for the size of paper we were using, but you can go bigger) draw an organic line on either the top or bottom from corner to top corner.
2. Draw another organic line from corner to corner on either the right or left side of the square.
3. Cut the first line you drew making sure to cut only from corner to corner and slide to the opposite side. So if you cut the top side then you will slide it to the bottom of the square and tape in place.
4. Cut the second line you drew from the side corner to corner making sure to only cut from corner to corner and slide it to the opposite side like you did in step 3.
5. At this point you can examine your shape to see what you think it looks like or you can wait until after the next step.
6. Begin tracing your shape onto a separate sheet of paper. After tracing, slide your shape to the right and trace. Continue to slide and trace your shape up, down, left, right until you completely fill the page.
7. Be creative and design and color your shapes.
I did a couple examples for my students using two types of tessellations. One like the steps above and the other called rotating tessellations (for the 6th - 7th grade students)
(My example using the above step by step process)
(my example of the rotating tessellation)
This is such a fun art project, and I like how unpredictable and unlimited the outcome is. Give the lesson a try and leave in comments what you think.
Student Gallery:

(Olive Parker 3rd Grade)

(Olivia Nipps 4th grade)
What I would do differently if I taught this lesson again:
There isn't much I would change in the lesson itself, but I found that many of the students were very conservative when drawing their lines which resulted in a less interesting shape. When demonstrating the steps to create their tessellation template, I would stress more on drawing their line deeper into their square rather than keeping their line close to the edge of the square. Despite that, I am very pleased with the creativity the students had with their shapes.


4 comments
hydroxychloriquine chloroquine online long term side effects of plaquenil
tadarise 40 mg what is tadalafil tadalifil
hydrochlorique chloroquine hydrochloride malaria usmle
cloroquina 250 mg hydroxychloroquine over the counter is chloroquine a sulfa drug